Monday, February 2, 2015
Android beginner tutorial Part 20 ImageButton widget
Today well learn about the ImageButton widget.The ImageButton component is similar to a regular Button, with the only exception that instead of text, it displays an image. If you havent already read one of my earlier tutorials about ImageView class, do so, because in this tutorial we will be working with drawable resources.
Lets start writing our example application right away - go to activity_main.xml layout file and create a simple layout with an ImageButton inside of it. Use its android:src attribute to set the image source:
<LinearLayout xmlns:android="http://schemas.android.com/apk/res/android"
    xmlns:tools="http://schemas.android.com/tools"
    android:layout_width="match_parent"
    android:layout_height="match_parent"
    android:orientation="vertical"
    tools:context=".MainActivity" >

    <ImageButton android:id="@+id/myButton"
        android:layout_height="wrap_content"
        android:layout_width="match_parent"
        android:src="@drawable/snowflake"
        />

</LinearLayout>
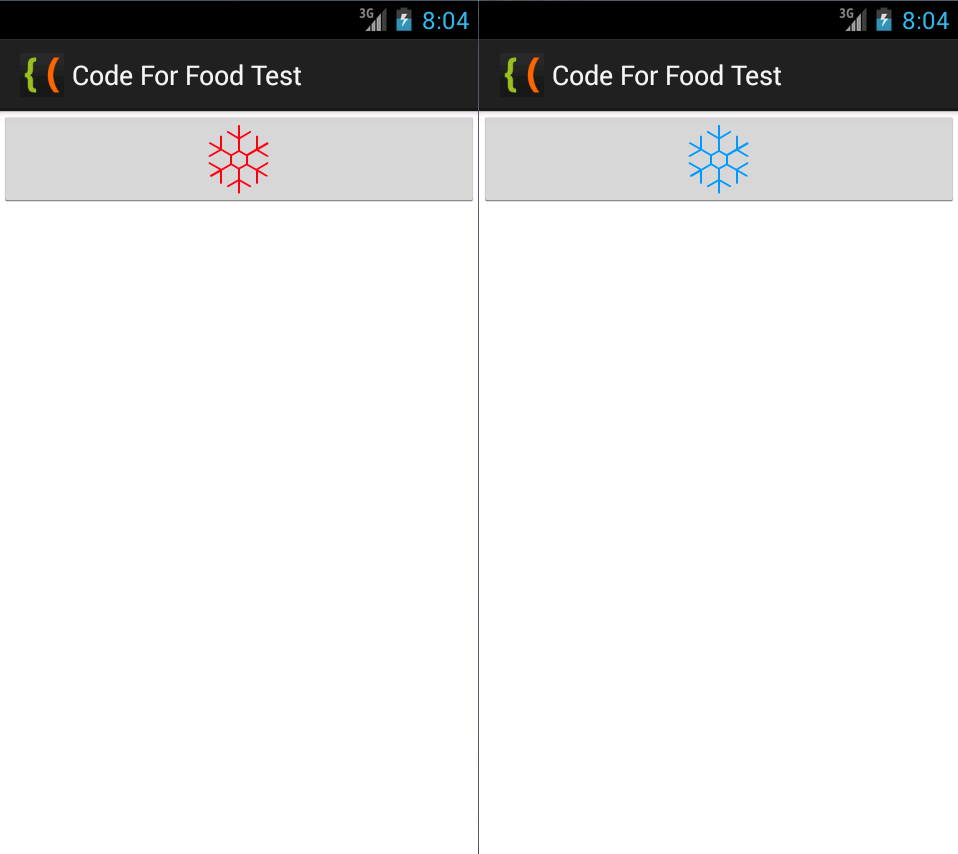
I should note that in this tutorial Im using 2 images - snowflake.png and snowflake2.png, which is basically a recolored version of the original snowflake.
Go to MainActivity.java class now and create an Activity class that does the following things:
1. Declare 2 variables - "button" ImageButton and "toggle" boolean.
2. Set "toggle" to true in the onCreate() function.
3. Set "button" to our existing ImageButton in the layout xml.
4. Add a click listener to the button, which sets the image source of the button based on the "toggle" boolean value, also change the value of the "toggle" boolean to opposite.
Use the setImageResource() method to set image source dynamically.
Heres the code:
package com.kircode.codeforfood_test;

import android.app.Activity;
import android.os.Bundle;
import android.view.Menu;
import android.view.View;
import android.widget.ImageButton;

public class MainActivity extends Activity{

public ImageButton button;
private boolean toggle;

@Override
protected void onCreate(Bundle savedInstanceState) {
super.onCreate(savedInstanceState);
setContentView(R.layout.activity_main);

toggle = true;

button = (ImageButton)findViewById(R.id.myButton);
button.setOnClickListener(new View.OnClickListener() {

@Override
public void onClick(View v) {
if(toggle){
button.setImageResource(R.drawable.snowflake2);
}else{
button.setImageResource(R.drawable.snowflake);
}
toggle = !toggle;
}
});
}

@Override
public boolean onCreateOptionsMenu(Menu menu) {
// Inflate the menu; this adds items to the action bar if it is present.
getMenuInflater().inflate(R.menu.activity_main, menu);
return true;
}

}
If you run your application now on a device or an emulator, youll see that you can press the button to toggle the image. Heres what my application looks like (2 screenshots of what the button looks like before and after clicking it):

Thanks for reading!
Subscribe to:
Post Comments (Atom)
No comments:
Post a Comment
Note: Only a member of this blog may post a comment.